Adding an MQTT device to the IoT Tree
Article version 1.0
Prerequisites
- You have added a domain to the DCC
- You have an account on the Inuatek Data Collection Cloud
- You have a compatible MQTT device
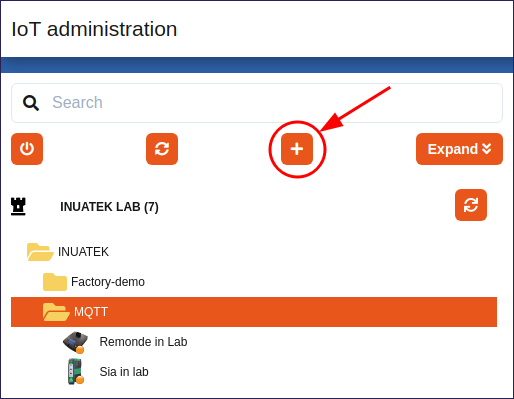
IoT Administration page
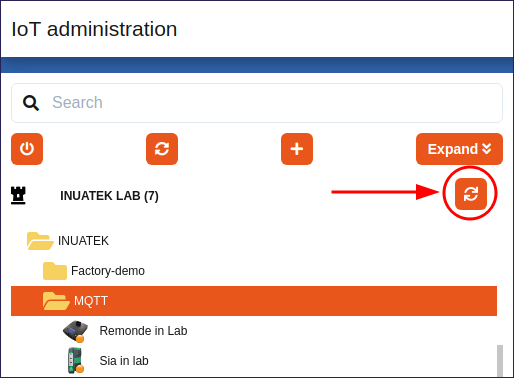
Navigate to the IoT Administration page. Select a location in a Domain and click the "+" button:
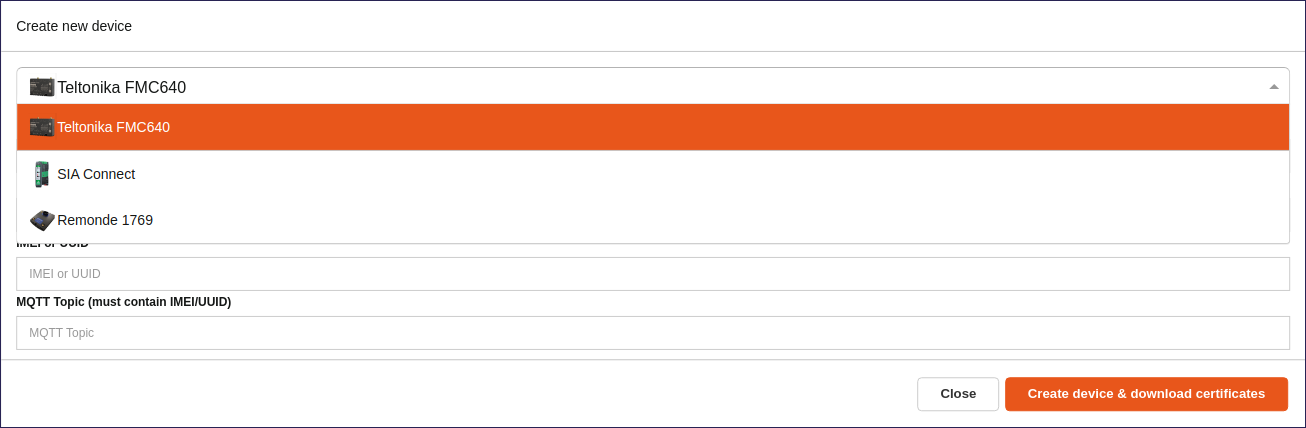
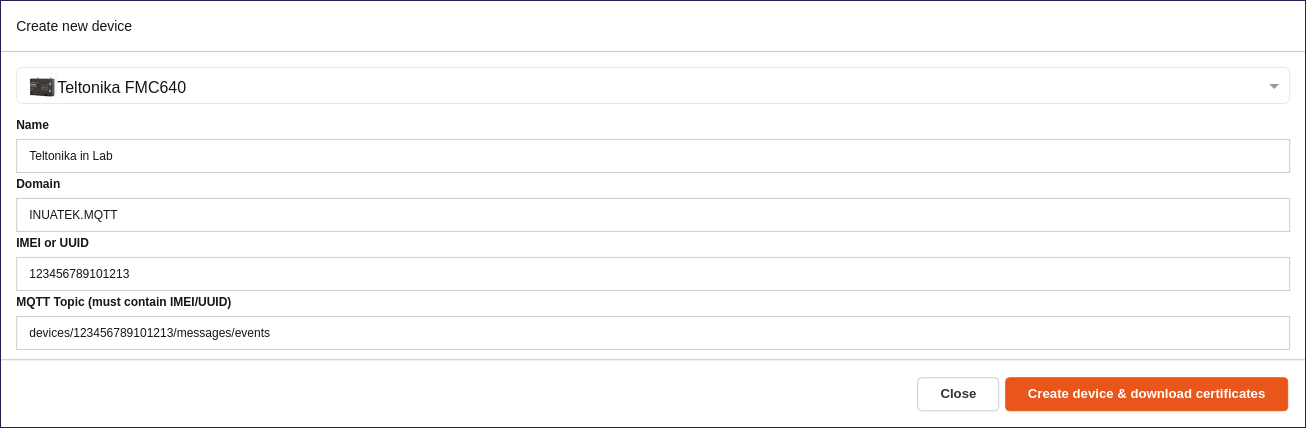
A pop-up will appear. Select your device type in the dropdown menu:
All four fields must be filled out in order to create the device:
- The name of the device.
- Device location in the domain. The field will be filled out with the location you selected previously.
- Device IMEI or UUID.
- Base MQTT Topic of the device. This topic MUST contain the device IMEI or UUID. See Security.
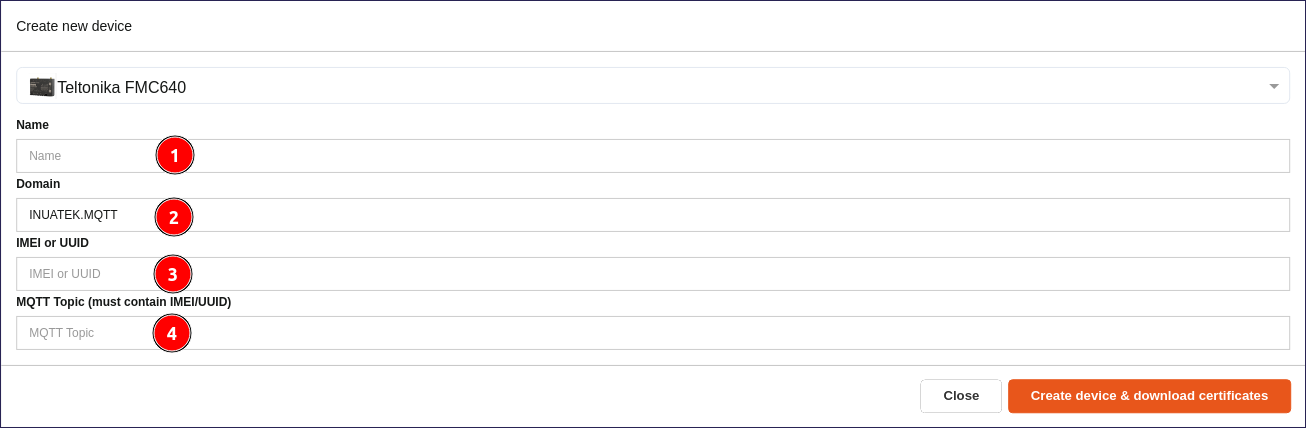
In the example below a new Teltonika FMC640 is being added. Notice that the MQTT topic contains the IMEI.
Finally, click the Create button. The device will now be added to the domain. If they device is not present immediately in the tree, simpy Synchronize the tree:
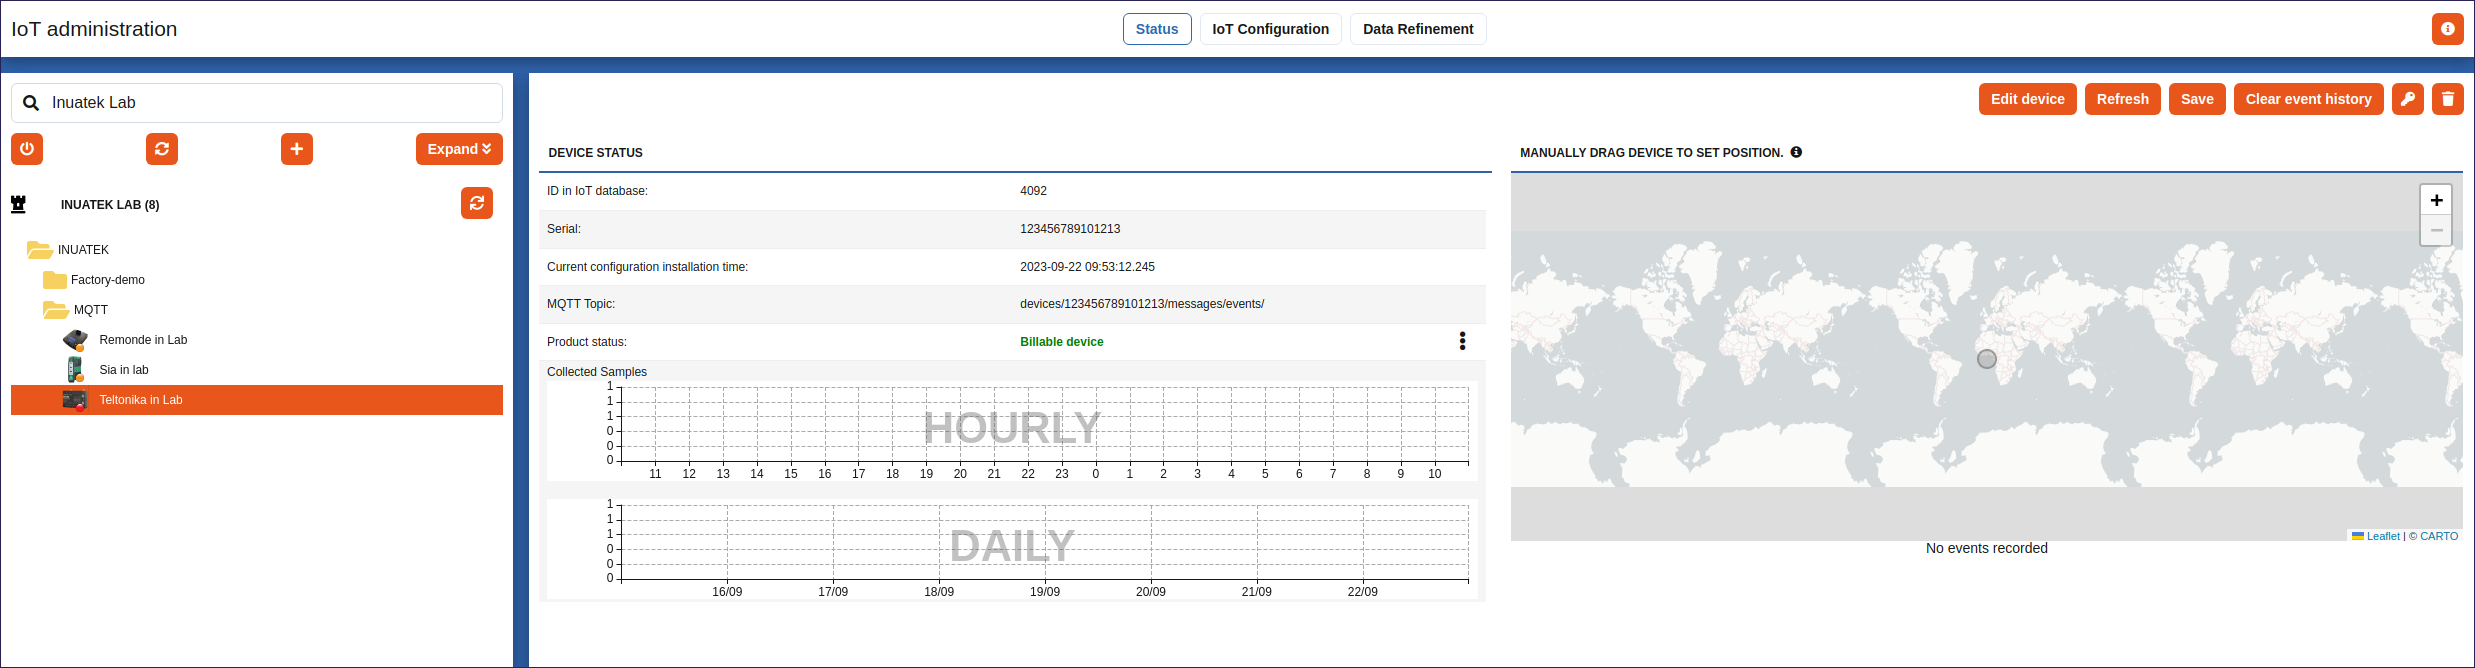
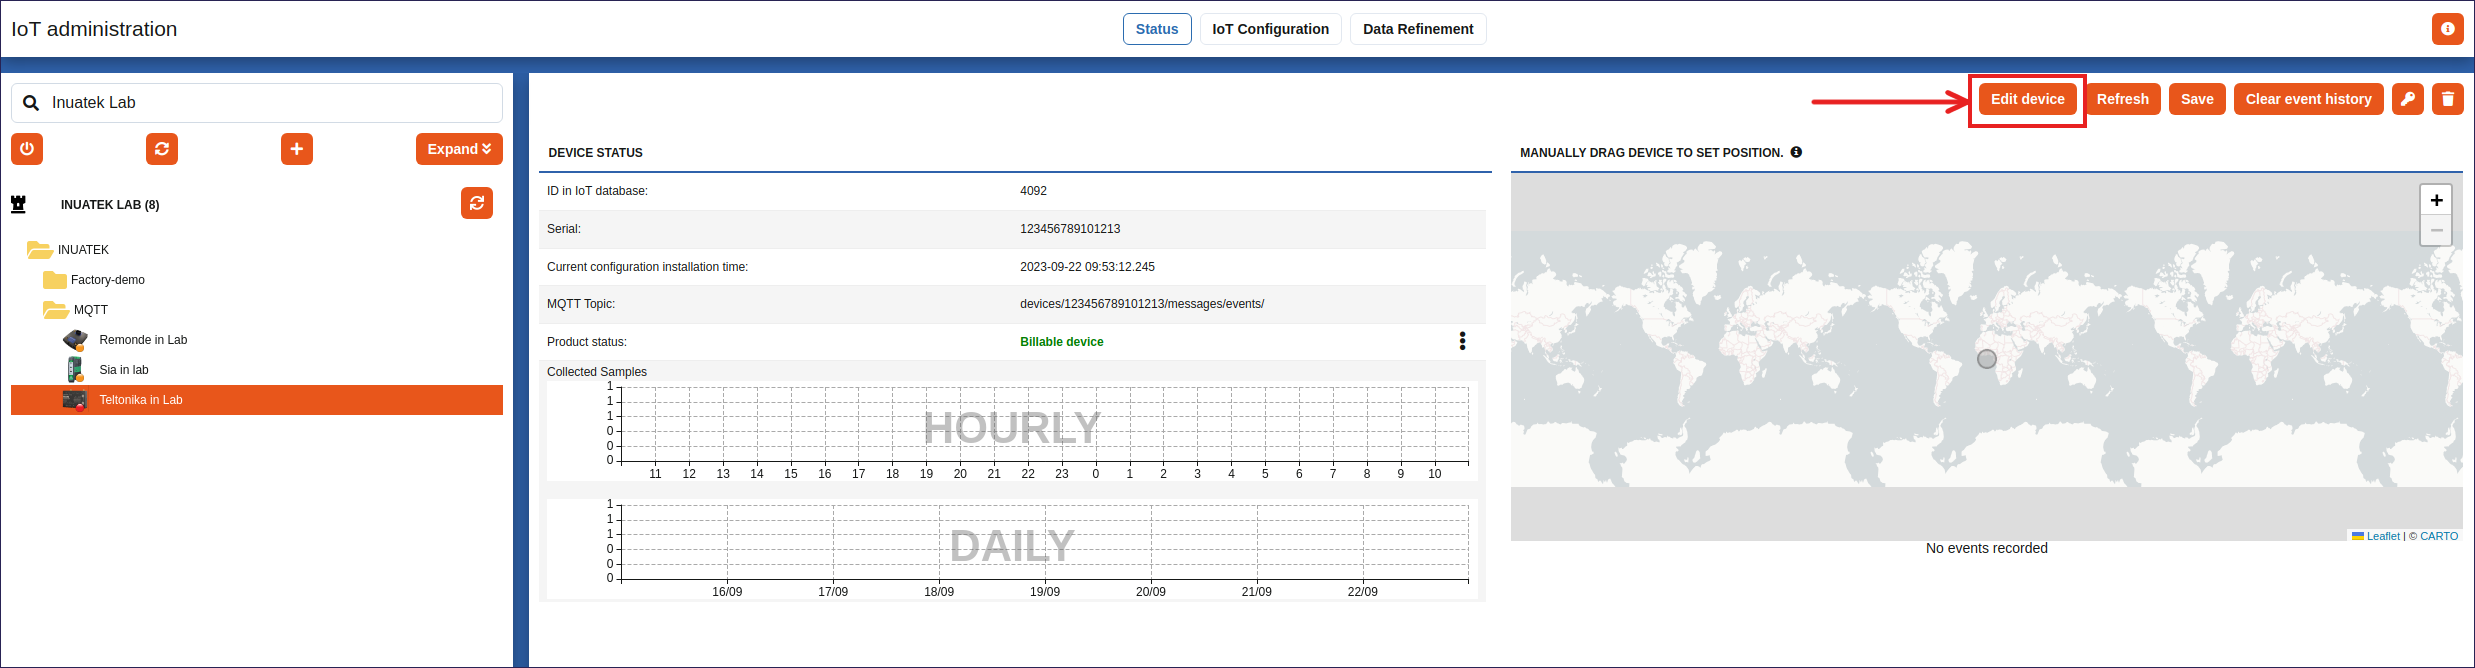
The device will now appear in the Tree. After selecting the device, device information is displayed.
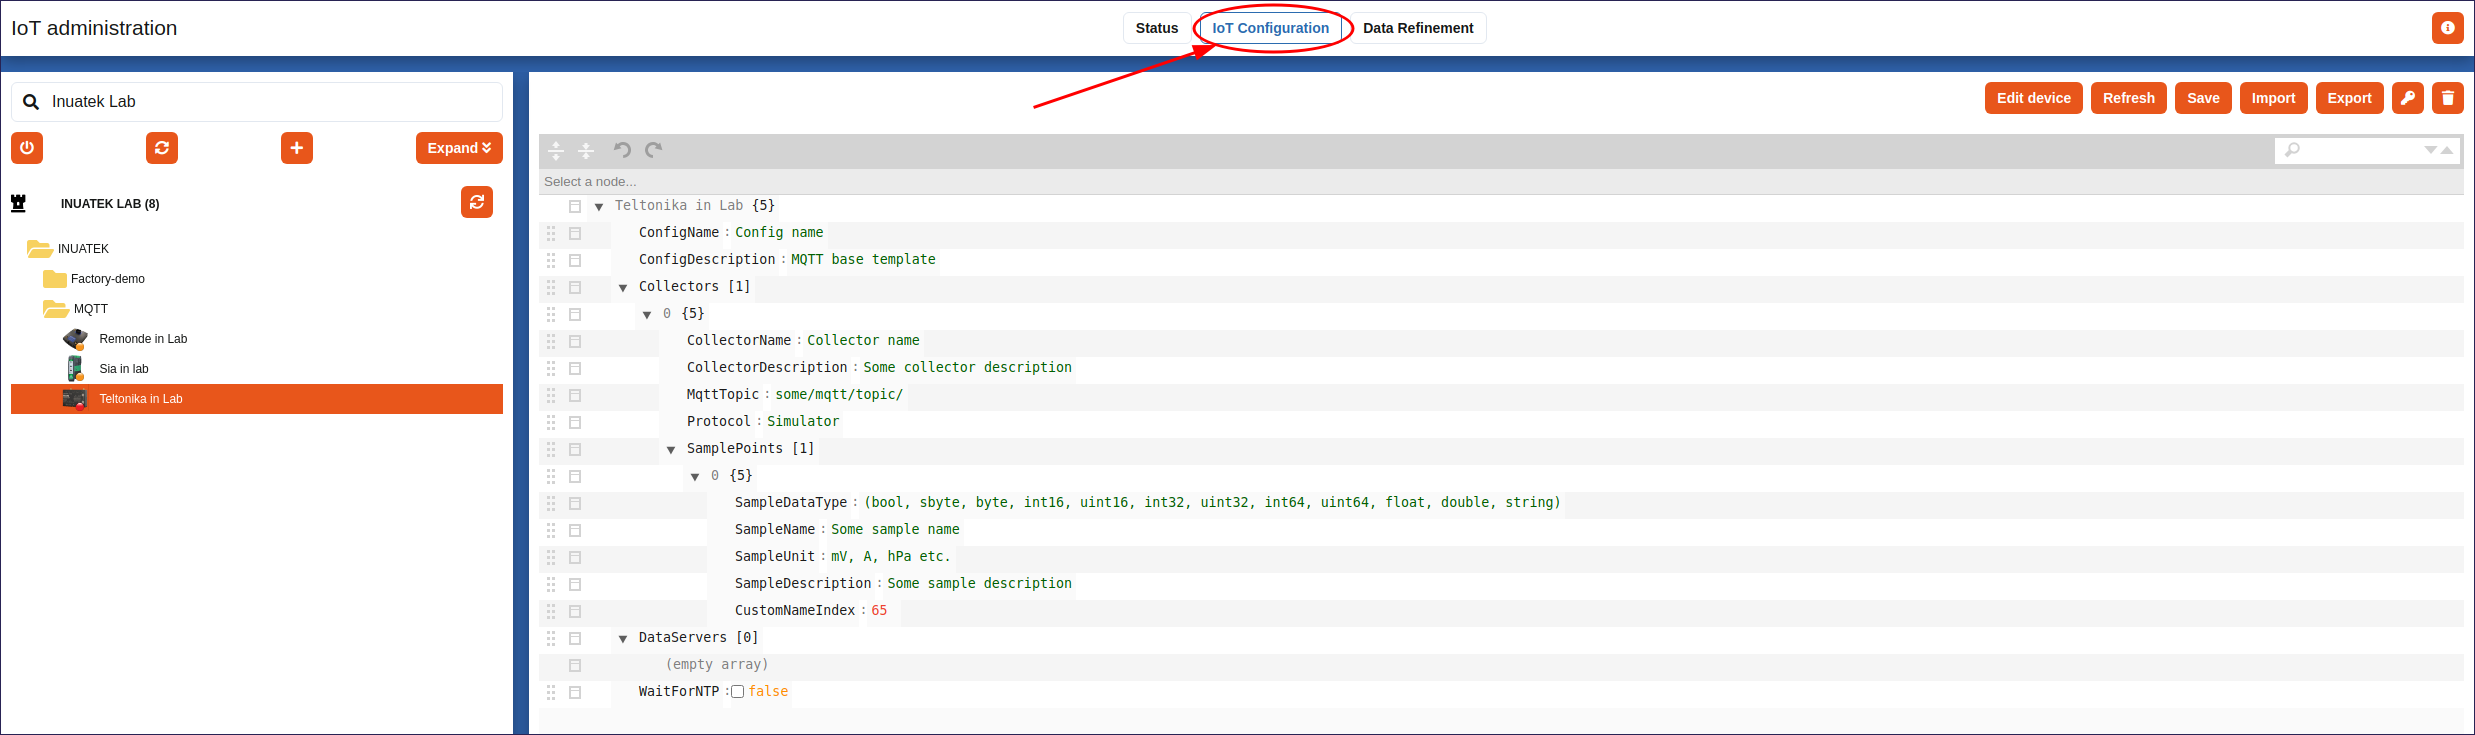
Navigating to the IoT Configuration tab, a basic configuration template has been added. The device is now ready for configuration. See section Creating an IoT Configuration for instructions on how to set up the configuration.
Supported devices
The list of supported devices is being expanded continuously. Currently, the supported devices are:
- SIA Connect
- Teltonika FMC640
- Remonde 1769
For applications where the MQTT message payload can be customized, a generic JSON format must be used:
{
    "data": [
        {
            "v":   "300",
            "t":   1693562400000,
            "id":  10
        },
        {
            "v":   "23.991",
            "t":   1693562400000,
            "id":  11
        }
    ]
}
The JSON format contains a list of datapoints. Each datapoint has a value, timestamp and name index:
- v: datapoint value (string)
- t: UNIX timestamp in milliseconds
- id: Unique name index value*
* The value of id is directly mapped to the name index specified in the IoT configuration.
Security
The MQTT broker uses SSL encryption, and thus it is not possible to connect to the broker without SSL. Certificates are generated when setting up the device, but can also be generated afterwards.
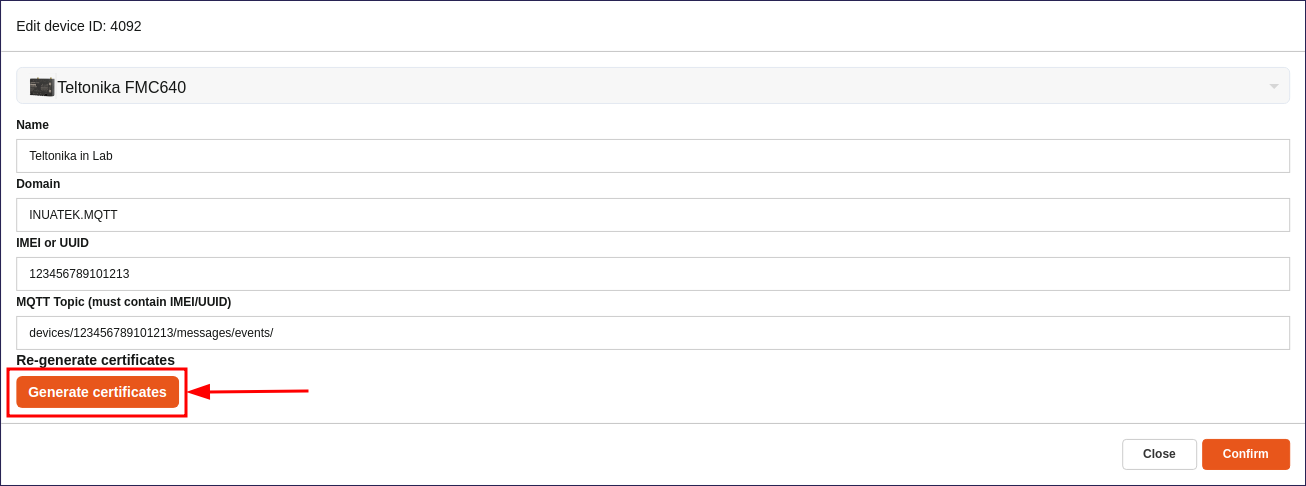
If you wish to generate new certificates, select the device in the IoT Tree and click Edit device:
By clicking the Generate button, a new set of device specific certificates will be downloaded in the browser as a ZIP archive.
Note: When generating new certificates, any prior certificates will no longer work.
MQTT Base Topic
The broker implements an Access Control List which limits device access. This ensures that devices cannot send data across topics of other devices. When an MQTT device is created, a Base Topic is provided which gives access for the device to Publish messages to this topic, and any sub-levels of this topic. The Base Topic must be unique for the device and comply with the following rules:
- The topic must contain the device UUID or IMEI.
- The topic must not contain the UUID or IMEI of another device.
- The topic must not contain wildcards, such as "+" or "#".
Note: A forward-slash will by default be appended to the Base Topic if the topic does end on a forward-slash.
Creating an IoT Configuration
When a device has been created in the IoT Tree, a simple JSON configuration can be found in the IoT Configuration tab. The purpose of this configuration is mapping name indexes of samplepoints received via MQTT Messages to the Database.
An IoT Configuration may consists of one or more Collectors, each having one or more Sample points. It is crucial that the name indexes are distinct, otherwise they will be overwritten.
If you wish to change the MQTT topic of a device, simply edit the MQTT topic. Remember to update the MQTT topic if you update the IMEI or UUID. You must also generate new certificates if you have updated the IMEI or UUID.
How does Name Indexing work?
Using the custom JSON format described in the Supported Devices section, name index can be chosen at free will, as long as they match the name index sent from the device. Only data from datapoints which have an entry in the IoT Configuration will show up on the DCC. If a device is sending more IDs than specified in the IoT Configuration, the extra IDs will not be stored. If a device is sending less IDs than specified in the IoT Configuration, the IDs with entries will be stored as usual.
For the Teltonika FMC640 device, name indexes cannot be chosen at free will. Instead, they are predetermined. See Connecting a Teltonika Device.
Example configuration
The example below consists of one Collector with two Samplepoints.
{
    "ConfigName": "Simple MQTT configuration",
    "ConfigDescription": "MQTT example configuration",
    "Collectors": [
        {
            "CollectorName": "Collector name",
            "CollectorDescription": "Some collector description",
            "MqttTopic": "devices/123456789101213/messages/events",
            "SamplePoints": [
                {
                    "SampleDataType": "int16",
                    "SampleName": "Front wheels",
                    "SampleUnit": "RPM",
                    "SampleDescription": "Front wheel RPM",
                    "CustomNameIndex": 10
                },
                {
                    "SampleDataType": "float",
                    "SampleName": "Voltage",
                    "SampleUnit": "mV",
                    "SampleDescription": "Supply voltage",
                    "CustomNameIndex": 11
                }
            ]
        }
    ],
    "DataServers": [],
    "WaitForNTP": false
}
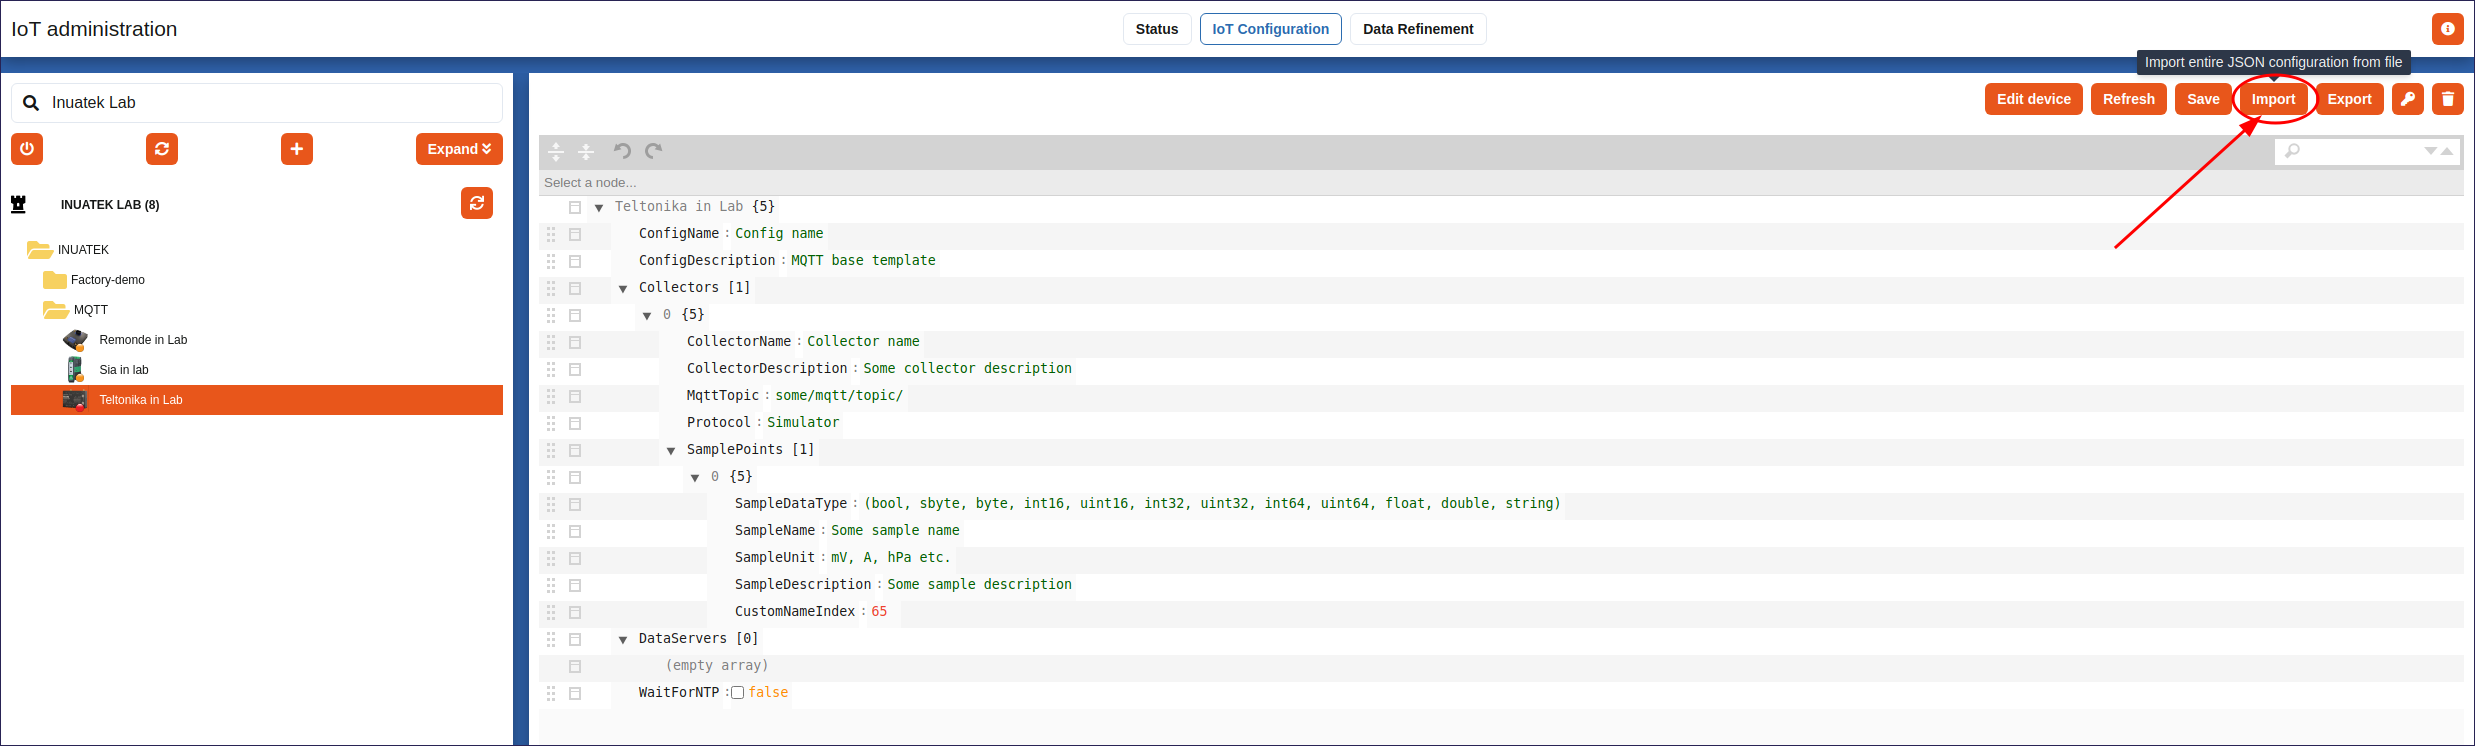
The IoT Configuration can be edited through the DCC. You can also create a JSON configuration in your own editor, and upload the configuration to the device. On the IoT Configuration tab click the Import button.
The JSON configuration will be loaded and the Save button will become active. Click the Save button to save the configuration. It may take up to 30 seconds for the DCC to recognize the new configuration. Click the refresh button to see if the configuration has been updated. The "!" should disappear from the Save button if the DCC has finished updating the configuration.
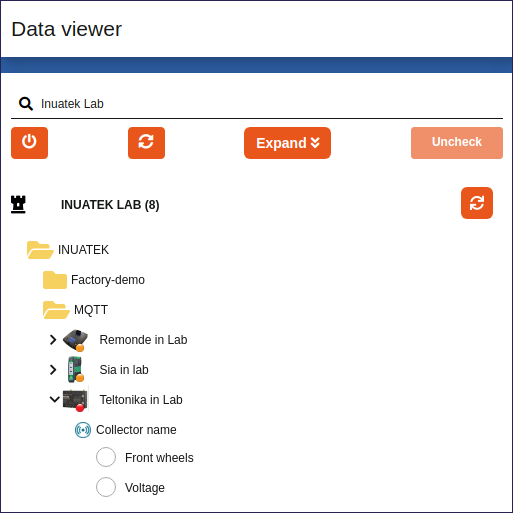
Head to the Data Viewer page. It may be required to Synchronize the Domain one more time in order to see the new sample points.
When the synchronization has completed, the Sample Points will appear under the device: